DIY Dip Dye Curtains: A Step-By-Step Tutorial


Are you a DIYer? Add a creative flair to your space with DIY dip dye curtains!
Do-it-yourself projects aren’t always easy, but the results are well worth it.
Whether you’re updating old curtains or in need of brand new window treatments, these DIY ombre curtains are sure to beautify your living space. Follow our simple step-by-step tutorial to create dip dye curtains today!

How to Make DIY Dip Dye Curtains
The dip dye technique involves dipping the bottom of a curtain into dye to create a two-tone look with an ombré effect.
Here’s what you’ll need to make dip dye curtains, DIY style:
- White cotton curtains
- Procion dye
- 1 ½ cup salt
- ⅓ cup soda ash
- Large plastic tub
- Mixing bowl and spoon
- Rubber gloves
Important: Before you start, take note of curtain length, which will affect how much (and how long) you need to submerge your curtains in the dye.
Do you want your dip dye curtains to look crisp and tailored, or would you prefer they cascade onto the floor? ‘Float’ curtains sit within one inch of the floor, while ‘kiss’ curtains graze the floor slightly. ‘Puddle’ curtains pool out onto the floor for a more dramatic, romantic look.
Step 1: Prepare Your Materials
First, gather your materials.
Also, remember that dye can stain products permanently, so clear your workspace before you start and ensure you have ample room to spread out. To keep dye under control, lay out an old plastic tablecloth or complete your project outside.
Fill your plastic tub one-third to halfway full with lukewarm water. You’ll be using this to dye your curtains once they’re ready.
Step 2: Mix the Dye
Fill your mixing bowl with lukewarm water, mixing in your dye one teaspoon at a time until you reach your desired color. The more dye you add, the darker the color will be.
Be careful not to darken the dye too much, or you may lose the ombre effect.
Next, pour the dye and the salt into the plastic tub and mix well. The dye and salt will dilute into the water. Adding salt to the dye will help you achieve a smooth, non-streaky finish.
Step 3: Mix the Soda Ash
Combine soda ash with about eight cups of hot water. After mixing thoroughly, pour the soda ash solution into the plastic tub and mix it again. Soda ash helps the dye set into the fabric for long-lasting results.
Step 4: Wet the Curtains
Lastly, ready your curtains by wetting them with cool water. If your curtains are old or dirty, you may want to machine wash them in cool water before you dye them.
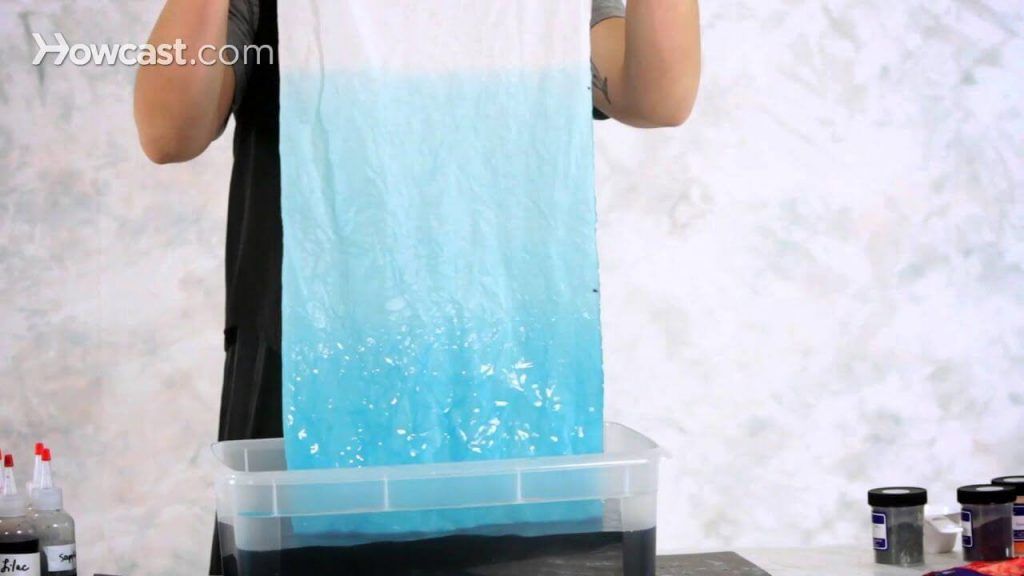
Step 5: Dip Dye the Curtains
It’s time to begin the dyeing process!
To dye your curtains, line them up so that the bottom edges are even and dip them into the dye. The further you dip your curtains into the dye, the higher the color will appear. Once you dip your curtains into the dye, the color will be permanent — so choose wisely!
Drape your curtains over the plastic tub and leave them in the dye for 15 minutes. After 15 minutes, pull your curtains approximately one foot out of the dye. Repeat this process until you have reached the end of your curtains.
You should begin to see an ombre pattern as you pull your curtains out of the dye. If you do not see enough contrast, you can add more dye to the plastic tub or leave your curtains in the dye a little longer.
Step 6: Wash the Curtains
After the dyeing process, you’ll want to rinse your curtains to remove excess dye for a clean slate. Rinse in cool water until the runoff is clear and dye-free. Be careful not to let the colored runoff touch the rest of your white curtains.
Follow up by machine washing your curtains in cool water according to the fabric instructions.
Then, air dry your curtains, preferably in a cool climate with natural light. If you must use a dryer, double-check that your curtains are dryer-safe first.
Step 7: Steam the Curtains
Lastly, steam your curtains to get them ready to hang! You can use an iron, but make sure to use the lowest heat setting.
Remove any wrinkles, so your curtains don’t look disheveled when you hang them.
Step 8: Hang Your Dip Dye Curtains
Last but not least, it’s time to put up your curtains. Hanging curtains might be the most challenging part of this DIY project — but it doesn’t have to be!
Hang your freshly dip-dyed curtains in minutes with Kwik-Hang’s damage-free curtain rod brackets! Just align the brackets to your window trim, tap them in with a hammer and hang your curtains. Not only is Kwik-Hang hardware easy to install, but it also won’t leave holes or damage on your walls and woodwork.
Perfect your DIY curtains by experiencing the Kwik-Hang difference today!